Showing posts with label Holidays. Show all posts

Thursday, 5 May 2011

Mother's Day Baking Take Two: Pina Colada Cheesecake

I decided I would do two different smaller cheese cakes instead of one big one to add a little more summer and a little more variety into the day. 
 Ingredients
  • 3 tablespoons unsalted butter, melted
  • 1 cups graham cracker crumbs
  • 2/3 cup chopped pecans, toasted
  • 1/2 tablespoon sugar
  • 1 1/2 (8-ounce) packages cream cheese, softened
  • 1/4 cup sugar
  • 3 large eggs
  • 1/2 (8-ounce) can crushed pineapple, drained
  • 1/2 cup cream of coconut
  • 1/2 cup sour cream
  • 5 tablespoons light rum
  • 2 teaspoons coconut extract 
 Glaze:
Whip cream and toasted coconut
Preparation
  • Stir together first 4 ingredients, and press into bottom and 1 1/2 inches up sides of a lightly greased 10-inch springform pan.
  • Beat cream cheese and 1/2 cup sugar at medium speed with an electric mixer 3 minutes or until fluffy. Add eggs, 1 at a time, beating well after each addition. Add pineapple and next 4 ingredients, beating until blended. Pour mixture into crust.
  • Bake at 325° for 1 hour and 15 minutes or until center is almost set. Cool on a wire rack. Spread Glaze over top of cheesecake. Cover and chill at least 8 hours. Garnish, if desired.
 Recipe adapted from My Recipes

I think I might do an addition glaze like this (before the whip cream and toasted coconut):


Pineapple Glaze:
1 cups crushed pineapple, fresh or canned
1/4 cup pineapple juice and/or rum
1/8 cup sugar
1 tablespoon cornstarch

When both the cake and the glaze are only slightly warm, pour the glaze over the cake and smooth the top. 


If you're looking for some Pina Colada Cupcakes check out a great recipe for them over at Kimmy's Kitchen!!

I've shared these recipes at:
Making It with Allie
Thrilling Thursday
Strut Your Stuff Thursday
Creative Juice Thursday
Hookin' Up With House of Hepworths
Show Off Your Stuff Party
Delightfully Inspiring Thursday
Recipe Swap Thursdays
It's a Keeper Thursday
Full Plate Thursday

Wednesday, 4 May 2011

Mother's Day Dessert: Vanilla Bean Cheesecake


I've decided I'm going to make this for Mother's Day this year. We're going to have a BBQ and well, it's not exactly the dessert you'd have at a BBQ but this is my Mother-in-laws favorite dessert and I know my mom will love it so I'm going to give it a go! I'll be sure to post all about it and all the other great food we have! 


Ingredients (Recipe adapted from All Recipes)

  • 1/2 (18 ounce) package vanilla sandwich cookies
  • 1/2 vanilla bean, split lengthwise and seeds scraped
  • 1/8 cup butter, melted
  • 1 pounds cream cheese, softened
  • 3/4 cups white sugar
  • 3 eggs
  • 1 vanilla beans, split lengthwise and seeds scraped
  • 1/2 tablespoon pure vanilla extract
  • 1/3 cup sour cream
  • 1/4 cup heavy cream

Directions

  1. Preheat oven to 300 degrees F (150 degrees C), and lightly butter a 6 inch spring-form pan.
  2. Place the sandwich cookies into a plastic bag, and crush with a rolling pin. Pour the crumbs into a bowl, and mix with the scraped seeds of 1 vanilla bean. Drizzle the crumbs with melted butter and stir to combine. Press the crumb mixture firmly into the bottom and up the sides of the spring-form pan, and set aside.
  3. Place the softened cream cheese and sugar into the work bowl of an electric mixer, and beat for about 3 minutes on Medium speed, until the mixture is smooth. Beat in the eggs one at a time, incorporating each egg before adding the next one. Add the scraped seeds of 2 vanilla beans, the vanilla extract, sour cream, and heavy cream, and beat on Medium-High speed for about 1 minute, until the mixture is blended and smooth.
  4. Pour the mixture into the cookie crumb crust, leaving about 2 inches of space from the top of the pan for the cake to expand as it bakes.
  5. Place a baking dish onto the bottom rack of the preheated oven, and fill it halfway with boiling water. Place the cheesecake onto the middle rack, above the pan of boiling water, and bake until a small knife inserted into the middle of the cheesecake comes out clean, about 1 hour and 20 minutes.
  6. Turn the oven off and let the cheesecake cool down inside the oven for 1 hour. Cover the cheesecake with plastic wrap, then aluminum foil, and refrigerate at least 4 hours or overnight before serving.


I think I might try this crust and add this topping to it:

Topping:
    2 cups sour cream 
    1/4 cup sugar 
    1 vanilla bean 
For topping: in a small bowl, combine sour cream and sugar. Scrape the seeds from the vanilla bean and add to the bowl, stirring well.

I think I might also make a Vanilla Bean Butter Cream Icing, you know add a little more decadence to this cake!

1 1/4 sticks unsalted butter, softened (helpful hint: one stick of butter is 1/2 cup)
1/2 vanilla bean, halved lengthwise
1 1/4 cups confectioners’ sugar (5 ounces)
Pinch salt
1/2 teaspoon vanilla extract
1 Tablespoons heavy cream

1. In a standing mixer fitted with the whisk attachment, beat the butter at medium-high speed until smooth, about 20 seconds. Using a paring knife, scrape seeds from vanilla bean into butter and beat mixture at medium-high speed to combine, about 15 seconds.
2. Add confectioners’ sugar and salt; beat at medium-low speed until most of the sugar is moistened, about 1 minute. Scrape down the bowl and beat at medium speed until mixture is fully incorporated, about 30 seconds; scrape bowl, add vanilla and heavy cream, and beat at medium speed until incorporated, about 20 seconds, then increase speed to medium-high and beat until light and fluffy, about 4 minutes, scraping down bowl once or twice.

(Recipe adapted from Brown Eyed Baker)

I shared this recipe at:
Show & Tell Wednesdays 
Whatever Goes Wednesdays
Recipes I Can't Wait to Try
What's Cooking Wednesday
Wandering Wednesdays
Whatcha Makin' Wednesdays
Swing Into Spring
 

    Tuesday, 3 May 2011

    For Next Easter: Cadbury Cream Egg Cupcakes

    Don't these look wonderful? I know Easter is long past now but I keep finding all these wonderful recipe I want to try next year!

    Check out the recipe at My Baking Addiction

    Friday, 29 April 2011

    For Next Easter: Homemade Cadbury Eggs

    Don't these look wonderful! I've put them on my list of things to try next Easter! 
    Check out the recipe at Not Without Salt

    Wednesday, 27 April 2011

    Easter Hunt

     I decided it would be fun to do a little scavenger hunt in our new house. I love to do fun little things like this and who says you have to have kids to do them? I got some bunny ears, hid all the candy and waited for Marshall to get home. He was surprised (and being a candy/chocolate lover) and excited.

    I did the usual "Hot....Cold....Warmer..." and it was a lot of fun. I thought he found everything then I remembered about the mini eggs. I saw where he had all checked and I was certain I had hidden it behind a pillow. We searched for another 10 minutes and finally I checked a place I had seen him check and they were there. I guess he just didn't look hard enough? Just glad to know there's no chocolate hiding somewhere waiting for Ollie to find it, that would be bad.


    And the score in the end.

    Saturday, 23 April 2011

    Easter Baking Goals

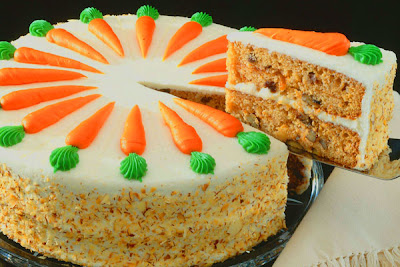
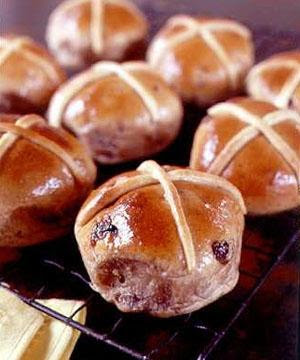
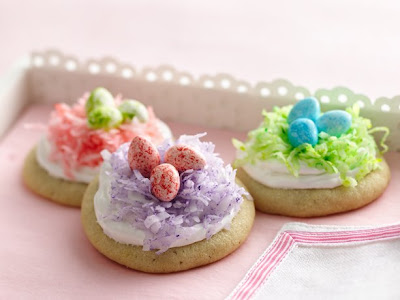
    I decided that with all the baking I am doing through my Baking My Way Through project I wouldn't do any Easter baking. So I thought I would do a post instead of all the fun stuff I see out there. Maybe next year I'll try one or two of them. If you like any of these ideas click on the photo to get to the recipe.


    Marshmallow Peanut Butter Square


    I couldn't find this recipe in any of my books, or online under any name I tried. Finally I in listed facebook, asked on my “What’s on your mind?” area and sure enough 4 of my friends knew a recipe! (I love facebook for that; if I don’t know something all I have to do is ask and someone out there can help me, it’s great!) So in case you were in the same spot I was and couldn’t find a recipe, or you’ve never tried it before (you have to now, it’s amazing!) here you go! Enjoy!


    2 pkg. butterscotch chips, or peanut butter chips
    3/4 cup peanut butter
    1/2 cup butter or margarine
    4 cups miniature marshmallows (the colored ones are the best)

    Place the first 3 ingredients into a microwave safe bowl. Microwave for 1-1/2 minutes, then stir. Microwave for an additional 1-1/2 minutes. Continue at 30 second intervals until melted. Stirring in between each setting. Let cool a couple of minutes and add 4 cups marshmallows and stir well. Pour into a 9 x 13 inch pan and spread evenly. Let cool completely, then cut into squares.

    Option: you could also do the melting in a double boiler, or just a pot if you don’t like doing things in a microwave

    I shared this recipe at: